- 0 comments
Fuel Efficiency Tips to Save Money on Gas
Rising gas prices are affecting drivers across the country, with average prices climbing above $4 per gallon in many areas due to supply pressures and increased demand. For drivers, improving fuel efficiency isn’t just a smart habit; it’s a necessary strategy to reduce everyday expenses. At NSAB.shop, we believe small changes in how you drive and maintain your vehicle can lead to significant savings over time. Here are practical, proven fuel efficiency tips every driver should implement.
Drive Smarter, Not Harder
One of the biggest factors affecting fuel consumption is driving behavior. Aggressive driving, such as rapid acceleration and hard braking, can reduce fuel efficiency by up to 33% on highways and even more in city conditions. Instead, focus on smooth acceleration, gradual braking, and maintaining a steady speed. Anticipating traffic ahead allows you to coast rather than constantly stopping and starting, which conserves fuel.
Maintain a Consistent Speed
Driving at high speeds significantly reduces fuel efficiency. In fact, every 5 mph over 50 mph can increase fuel costs per gallon. Using cruise control on highways helps maintain a consistent speed and prevents unnecessary fuel waste. Slowing down slightly can have a noticeable impact on your gas mileage.
Avoid Excessive Idling
Idling gets you zero miles per gallon. Whether you’re waiting in a parking lot or sitting in a drive-thru, turning off your engine when stopped for more than a minute can save fuel. Even short periods of idling add up over time and contribute to unnecessary fuel consumption.
Keep Your Tires Properly Inflated
Underinflated tires increase rolling resistance, forcing your engine to work harder and burn more fuel. Regularly checking and maintaining proper tire pressure is one of the easiest ways to improve fuel efficiency. It also enhances safety and extends the life of your tires.
Reduce Weight and Drag
Extra weight in your vehicle can decrease fuel efficiency. Removing unnecessary items from your trunk or backseat helps your car operate more efficiently. Additionally, roof racks and cargo boxes create aerodynamic drag, which can significantly reduce gas mileage, especially at highway speeds.
Combine Trips and Plan Ahead
Short trips from a cold engine use more fuel than longer, continuous drives. Combining errands into one trip reduces the number of cold starts and improves overall efficiency. Planning routes ahead of time also helps you avoid traffic congestion and unnecessary detours.
Stay on Top of Vehicle Maintenance
Routine maintenance plays a crucial role in fuel efficiency. Keeping your engine properly tuned, replacing air filters, and using the correct motor oil all contribute to better gas mileage. A well-maintained vehicle runs more efficiently and consumes less fuel over time.
Use the Right Fuel and Find the Best Prices
Using premium gasoline when your vehicle doesn’t require it is an unnecessary expense. Sticking to the recommended fuel type can save money without impacting performance. Additionally, using apps to locate cheaper gas stations or taking advantage of loyalty programs can further reduce costs.
Fuel efficiency isn’t about making drastic changes—it’s about building smarter habits. By driving more smoothly, maintaining your vehicle, and being mindful of how and when you drive, you can significantly reduce fuel consumption and save money. With gas prices expected to remain volatile, adopting these strategies now will help you stay ahead and keep more money in your pocket.
- 0 comments
The Heart of the Drive: Why Local Care Matters at Northport Spring & Brake
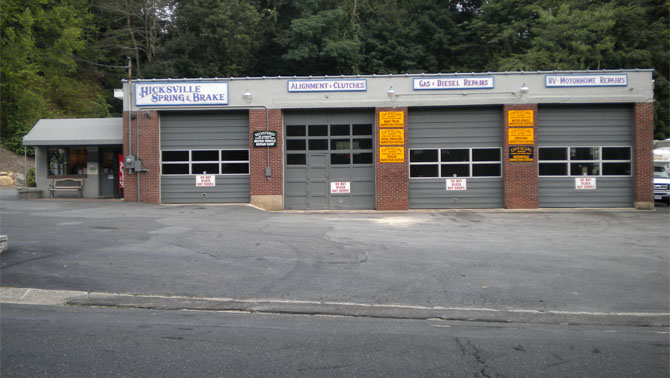
When you pull out of your driveway in Northport, NY, you aren’t just driving a machine; you’re navigating the lifelines of our community. Whether you are behind the wheel of a compact commuter car or operating a heavy-duty commercial truck, your vehicle’s health dictates the safety of our shared roads. Since 1980, Northport Spring & Brake has been the silent engine behind that safety, proving that where you choose to get your oil changed or your brakes serviced matters far beyond the garage walls.
The Power of Shopping Local: More Than Just a Transaction
In an era of massive national chains and impersonal service centers, Northport Spring & Brake stands as a testament to the “Shop Small” philosophy. But what does it actually mean to support a local small business?
-
Circulating the Local Economy: When you spend a dollar at a local shop, a significantly larger portion of that money stays within Northport. It helps pay your neighbors’ wages, supports local youth sports teams, and contributes to the tax base that keeps our parks and schools thriving.
-
Accountability and Trust: Owners Rob and Greg aren’t just names on a business license; they are Northport High School alumni who grew up on these streets. In a small town, reputation is everything. You aren’t just “Customer #402”; you’re a neighbor. This creates a natural culture of honesty and integrity that big-box stores simply can’t replicate.
-
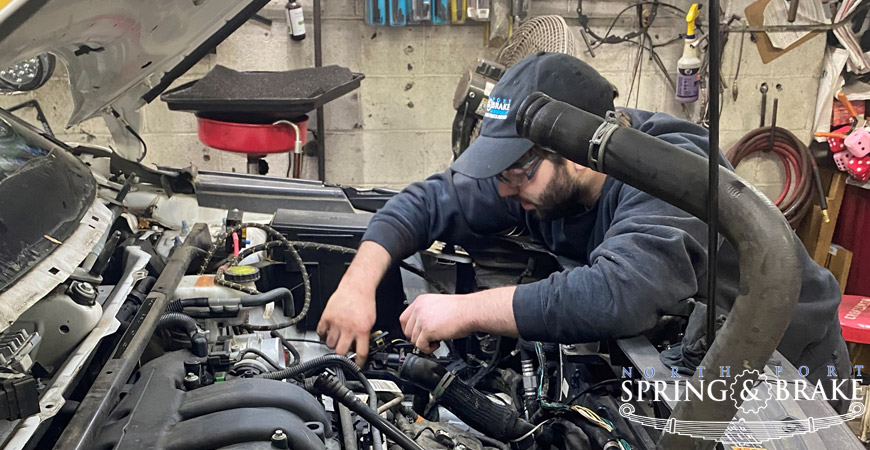
Specialized Expertise: While many shops shy away from the “big stuff,” Northport Spring & Brake is one of the few facilities on the North Shore equipped to handle everything from daily drivers to heavy commercial trucks, RVs, and trailers.
Safety: A Shared Responsibility
We often view car maintenance as a chore or an inconvenient expense. However, regular vehicle check-ups are actually a profound act of community safety. When you ensure your vehicle is in peak condition, you are making a commitment to every other person on the road.
1. The “Stopping Power” Factor
Brakes are your first line of defense. At Northport Spring & Brake, the technicians don’t just “check” your brakes; they ensure the entire system, from the pads to the heavy-duty springs, is capable of handling the weight of your specific vehicle. A well-maintained braking system can be the difference between a close call and a catastrophic collision.
2. Heavy Truck Integrity
For those operating heavy trucks and equipment, the stakes are even higher. A mechanical failure on a large commercial vehicle doesn’t just affect the driver; it can impact dozens of people on the highway. Regular fleet maintenance and specialized suspension work (like the leaf and coil spring repairs the shop is famous for) ensure these “behemoths of the road” stay under control.
3. Preventing the “Butterfly Effect.”
A small leak or a worn-out tire might seem minor, but on the Long Island Expressway or a rain-slicked local road, these small issues can lead to hydroplaning or engine stalls in dangerous traffic. Routine maintenance identifies these “ticking time bombs” before they cause an accident.
Trust the Neighbors Who Know Your Road
Choosing Northport Spring & Brake is about more than just fixing a rattle or passing a NYS Inspection. It’s about investing in a legacy of local expertise that has kept Northport moving for over four decades.
By prioritizing regular maintenance at a local, independent shop, you are doing three things at once: protecting your wallet from major future repairs, supporting the economic health of your hometown, and, most importantly, ensuring that everyone reaches their destination safely.
Next time your dashboard light flickers or your truck feels a bit “heavy” on the turns, remember that the best care is right around the corner. Your car, and your community, will thank you.

- 0 comments
Heavy Truck vs Passenger Vehicle Repair: Key Differences Every Driver Should Know
What’s the Difference Between Heavy Truck and Passenger Vehicle Repair?
When it comes to vehicle maintenance and repair, not all services are created equal. Heavy trucks and passenger vehicles may share the same roads, but under the hood, they operate in completely different worlds. Understanding the differences between heavy-truck repair and passenger-vehicle repair is essential for fleet owners, business operators, and everyday drivers alike.
1. Size and Complexity of Components
The most obvious difference lies in the size and complexity of the vehicles themselves. Heavy trucks, such as semis, dump trucks, and commercial delivery vehicles, are built with significantly larger engines, transmissions, braking systems, and suspensions. These components are designed to handle extreme loads and long-distance hauling.
Passenger vehicles, on the other hand, are engineered for comfort, efficiency, and everyday commuting. Their systems are smaller, less complex, and typically easier to access. As a result, repairs on passenger cars are generally quicker and less labor-intensive than those required for heavy trucks.
2. Specialized Equipment and Facilities
Repairing heavy trucks requires specialized tools, equipment, and facilities. Standard automotive lifts simply cannot handle the weight of a fully loaded commercial truck. Heavy-duty repair shops are equipped with industrial-grade lifts, diagnostic systems, and large work bays to accommodate oversized vehicles.
Passenger vehicle repair shops are more common and accessible. They use standard tools and equipment designed for smaller vehicles, making routine services like oil changes, brake replacements, and tire rotations faster and more affordable.
3. Technician Expertise and Training
Heavy truck repair technicians must undergo specialized training to work on diesel engines, air brake systems, and advanced commercial vehicle electronics. Diesel mechanics often have certifications that focus specifically on heavy-duty systems and regulatory compliance.
Passenger vehicle technicians, while highly skilled, typically focus on gasoline engines, hybrid systems, and standard automotive technology. The training paths differ significantly due to the unique demands of each vehicle type.
4. Maintenance Schedules and Usage
Heavy trucks are built for endurance and often spend long hours on the road, covering thousands of miles each week. Because of this, they require strict maintenance schedules to prevent costly breakdowns and ensure compliance with safety regulations. Preventative maintenance is critical in the trucking industry, where downtime directly impacts revenue.
Passenger vehicles experience less intensive use. While regular maintenance remains important, intervals are typically longer, and the consequences of delayed service are usually less severe than for commercial trucks.
5. Cost of Repairs
Repair costs for heavy trucks are generally higher due to the size of parts, complexity of systems, and labor involved. Even a simple repair can become expensive when dealing with large-scale components or specialized diagnostics.
Passenger vehicle repairs are typically more affordable. Parts are widely available, labor is less intensive, and the overall process is more streamlined.
6. Regulatory Requirements
Heavy trucks must adhere to strict federal and state regulations, including inspections, emissions standards, and safety compliance. Repair shops working on these vehicles must ensure that all work meets these legal requirements.
Passenger vehicles are also subject to regulations, but they are less stringent compared to those governing commercial trucking operations.
While both heavy trucks and passenger vehicles require regular maintenance and occasional repairs, the differences between them are substantial. From the scale of components to the expertise required and the costs involved, heavy truck repair is a more complex and specialized field. Understanding these distinctions helps vehicle owners make informed decisions, reduce downtime, and ensure long-term performance.
- 0 comments
Summer Road Trip Prep Checklist: AC, Coolant & Tire Pressure Tips
Hitting the road in the summer is one of the best ways to enjoy the season, but nothing ruins a trip faster than car trouble in the heat. Before you load up your vehicle and head out, taking time to prepare your car is essential for a smooth, safe, and comfortable journey. Three of the most important areas to check before any summer road trip are your air conditioning system, coolant levels, and tire pressure.
Stay Cool: Check Your AC System
Your vehicle’s air conditioning system isn’t just about comfort; it’s critical during hot summer drives. A properly functioning AC system helps keep you alert, reduces fatigue, and ensures a pleasant ride for everyone in the car.
Start by turning on your AC and paying attention to how quickly it cools the cabin. If the air isn’t as cold as it should be, or if you notice weak airflow, strange noises, or unpleasant odors, it may be time for a recharge or inspection. Low refrigerant levels are one of the most common issues, but clogged cabin air filters or worn components can also reduce performance.
If you’re unsure, it’s a smart move to have a professional inspect the system before your trip. Fixing AC issues early can save you from discomfort and costly repairs down the road.
Prevent Overheating: Inspect Coolant Levels
Summer heat puts extra stress on your engine, making your cooling system one of the most important components to check. Your coolant (also known as antifreeze) regulates engine temperature and prevents overheating, which can lead to serious damage if ignored.
Start by checking the coolant reservoir when the engine is completely cool. The fluid should be between the minimum and maximum lines. If it’s low, top it off with the appropriate coolant recommended for your vehicle.
It’s also important to inspect the coolant’s condition. If it appears rusty, dirty, or sludgy, it may be time for a coolant flush. Additionally, look for any signs of leaks under your vehicle or around hoses and connections. Cracked hoses or loose clamps can lead to coolant loss and overheating during long drives.
Keeping your cooling system in top condition ensures your engine stays at the right temperature, even during long stretches on hot pavement.
Drive Safely: Monitor Tire Pressure
Your tires are your only point of contact with the road, making proper tire maintenance essential for both safety and fuel efficiency. During the summer, heat causes air inside your tires to expand, which can lead to overinflation if not monitored properly.
Check your tire pressure when the tires are cold, ideally in the morning before driving. Compare the readings to your vehicle manufacturer’s recommended PSI, which can usually be found on a sticker inside the driver’s door or in the owner’s manual.
Both underinflated and overinflated tires can be dangerous. Low pressure can cause poor handling, reduced fuel efficiency, and increased risk of blowouts. Overinflated tires, on the other hand, reduce traction and can wear unevenly.
While you’re checking pressure, take a moment to inspect the tread depth and overall condition of your tires. Look for cracks, bulges, or uneven wear. Don’t forget to check your spare tire as well; you never know when you might need it.
Hit the Road with Confidence
Preparing your vehicle for a summer road trip doesn’t have to be complicated, but it does require attention to detail. By checking your AC system, maintaining proper coolant levels, and ensuring your tires are in top shape, you’re setting yourself up for a safer, more enjoyable journey.
A little preparation goes a long way. Whether you’re heading to the beach, the mountains, or just exploring somewhere new, taking these simple steps can help you avoid unexpected breakdowns and keep your focus where it belongs, on the adventure ahead.

- 0 comments
How Often Should You Change Your Oil? Mileage & Driving Habit Guide
Regular oil changes are one of the most important parts of maintaining your vehicle’s engine. Motor oil lubricates internal engine components, reduces friction, helps regulate temperature, and prevents harmful buildup that could damage your engine. But one of the most common questions drivers ask is: How often should you actually change your oil? The answer depends on several factors, including your vehicle type, the oil you use, and your driving habits.
The Traditional Rule: Every 3,000 Miles
For many years, the standard recommendation was to change your oil every 3,000 miles or every three months. While this guideline still applies in certain cases, especially for older vehicles, it is no longer the universal rule it once was. Advances in engine technology and oil quality mean many modern vehicles can safely go much longer between oil changes.
Modern Vehicles: 5,000–7,500 Miles
Most newer vehicles recommend oil changes every 5,000 to 7,500 miles when using conventional or synthetic blend oil. Manufacturers design modern engines to run more efficiently, and improved oil formulations provide better protection for longer periods.
If you drive a typical mix of city and highway miles, changing your oil within this range is usually sufficient to keep your engine running smoothly.
Synthetic Oil: Up to 10,000 Miles
If your vehicle uses full synthetic oil, you may be able to go 7,500 to 10,000 miles between oil changes. Synthetic oil is engineered to resist breakdown, handle higher temperatures, and provide superior lubrication compared to conventional oil. Many newer vehicles actually require synthetic oil because their engines operate at higher performance levels and tighter tolerances.
However, even if synthetic oil allows longer intervals, it’s still important to check your owner’s manual and monitor oil levels regularly.
Driving Habits Matter
Mileage alone doesn’t always determine when you should change your oil. How you drive plays a major role in oil wear and engine stress. You may need more frequent oil changes if you regularly:
- Drive short distances where the engine doesn’t fully warm up
- Sit in heavy stop-and-go traffic
- Tow trailers or heavy loads
- Drive in extremely hot or cold weather
- Take frequent short trips around town
These conditions are considered “severe driving conditions”, and they cause oil to break down faster. In these cases, a 3,000–5,000-mile interval may still be recommended.
Long Highway Driving
On the other hand, if most of your driving is steady highway travel, your engine operates more efficiently and your oil experiences less stress. Highway miles typically allow oil to last longer because the engine maintains consistent temperature and RPM levels. Drivers who regularly commute long highway distances may safely extend their oil change interval toward the higher end of manufacturer recommendations.
Pay Attention to Your Car’s Oil Life Monitor
Many modern vehicles include an oil life monitoring system that tracks engine conditions, mileage, and driving patterns. These systems calculate when your oil is actually nearing the end of its effective life. If your vehicle has this feature, it can provide a more accurate estimate of when an oil change is needed than mileage alone.
Signs Your Oil Needs Changing
Even if you track mileage carefully, it’s important to watch for warning signs, including:
- Dark, dirty oil on the dipstick
- Engine knocking or increased noise
- Oil warning light on your dashboard
- Decreased engine performance
- Burning oil smell
Ignoring these signs can lead to serious engine damage over time. For most drivers today, oil changes typically fall between 5,000 and 7,500 miles, though vehicles using synthetic oil may go up to 10,000 miles depending on driving conditions. However, the best rule is to follow your vehicle manufacturer’s recommendations and adjust based on how you drive.
Routine oil changes are a small investment that can significantly extend your engine’s life, improve performance, and prevent costly repairs down the road. Keeping up with this simple maintenance task ensures your vehicle stays reliable for many miles to come.
- 0 comments
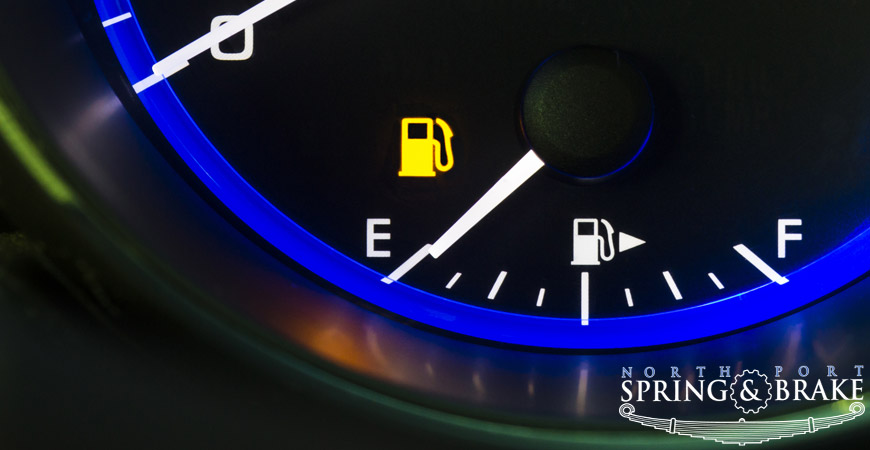
Why You Should Never Let Your Car’s Fuel Drop Below a Quarter Tank | Expert Tips
Most drivers wait until their gas light turns on before refilling. While it may seem harmless to run your vehicle until the tank is nearly empty, automotive experts generally recommend keeping your fuel level above one-quarter of a tank whenever possible. Allowing fuel to drop too low can create several problems for your vehicle, your wallet, and even your safety on the road.
Protects Your Fuel Pump
One of the most important reasons to keep at least a quarter tank of gas is to protect your vehicle’s fuel pump. The fuel pump is responsible for moving gasoline from the tank to the engine. In most modern vehicles, the pump sits inside the gas tank and relies on gasoline to cool and lubricate it while it operates.
When fuel levels drop too low, the pump can become exposed and may begin to overheat. Repeatedly driving on empty can cause premature wear and eventually lead to fuel pump failure. Replacing a fuel pump is not cheap; repairs can cost hundreds or even thousands of dollars, depending on the vehicle.
Prevents Sediment from Entering Your Engine
Over time, small amounts of dirt, rust, and sediment can settle at the bottom of a fuel tank. When the tank is nearly empty, the fuel pump may begin pulling gasoline from the very bottom where this debris sits.
While modern vehicles do have fuel filters, running on extremely low fuel increases the chance that sediment can make its way into the fuel system. This can clog filters, damage fuel injectors, and reduce engine performance. Keeping more fuel in the tank helps ensure the pump draws from cleaner gasoline.
Reduces the Risk of Getting Stranded
Running out of gas is not just inconvenient; it can also be dangerous. If your vehicle stalls on a busy highway, in extreme weather, or in a remote area, you may find yourself in a risky situation.
Maintaining at least a quarter tank gives you a safety buffer. Unexpected traffic, road closures, detours, or emergencies can easily add miles to your trip. Having extra fuel ensures you are prepared for situations you didn’t plan for.
Helps in Cold Weather
If you live in colder climates like New York or other northern states, keeping more fuel in your tank becomes even more important during the winter months. Low fuel levels can increase the chance of condensation forming inside the gas tank. Over time, this moisture can lead to water contamination in the fuel system.
Additionally, if you become stuck in traffic during a snowstorm or severe winter weather, having enough fuel allows you to keep the engine running for heat until help arrives.
Improves Fuel System Efficiency
Maintaining a higher fuel level can also help your vehicle’s fuel system operate more consistently. When your fuel pump constantly pulls from very low levels, it may work harder and strain the system over time.
By refueling before your tank gets too low, you help maintain stable fuel pressure, better engine performance, and longer component life.
A Simple Habit That Protects Your Car
Keeping your gas tank above a quarter full is a small habit that can make a big difference. It helps protect expensive components like your fuel pump, reduces the risk of pulling debris into your engine, and ensures you’re never caught off guard by an empty tank.
The next time you notice your fuel gauge approaching the halfway mark, consider stopping for gas sooner rather than later. Your car and your future repair bills will thank you.

- 0 comments
Spring Fleet Maintenance in Northport, NY | Northport Spring & Brake
As winter loosens its grip on Long Island and temperatures begin to rise, spring marks the start of the busy season for many local businesses. Landscapers, contractors, delivery services, and service fleets throughout Northport and the surrounding communities depend on their trucks and commercial vehicles to perform reliably every day. At Northport Spring & Brake in Northport, NY, we know that proactive spring fleet maintenance is the key to maximizing uptime and minimizing costly breakdowns when your schedule fills up.
Why Spring Fleet Maintenance Matters
Winter driving conditions take a toll on commercial vehicles. Road salt, moisture, freezing temperatures, and potholes can accelerate wear on critical systems like brakes, suspension, steering components, and batteries. As workloads increase in the spring, minor issues that went unnoticed during slower months can quickly escalate into expensive repairs and unexpected downtime.
Preventive maintenance in early spring allows fleet managers to identify and correct problems before peak demand hits. A well-maintained fleet not only improves reliability but also enhances safety, fuel efficiency, and overall operating costs.
Brake System Inspection
Brake performance is non-negotiable for fleet safety. After a harsh winter, it’s essential to inspect:
- Brake pads and shoes for wear
- Rotors and drums for scoring or warping
- Brake lines for corrosion
- Air brake components (for heavy-duty trucks)
- ABS system functionality
Road salt can accelerate corrosion in brake lines and hardware, especially here on Long Island. Addressing these issues early helps prevent sudden brake failures and ensures compliance with safety regulations.
Suspension & Steering Check
Potholes and rough winter roads can compromise suspension integrity. For work trucks carrying tools, materials, or equipment, worn suspension components affect handling, tire wear, and load stability.
A spring inspection should include:
- Leaf springs and coil springs
- Shocks and struts
- Ball joints and tie rods
- Bushings and control arms
- Steering alignment
At Northport Spring & Brake, we pay particular attention to heavy-duty leaf spring systems, ensuring your truck can safely handle payload demands during the busy season.
Tires & Alignment
Tire wear often worsens during winter due to poor traction conditions and misalignment caused by road damage. Spring is the ideal time to:
- Check tread depth
- Inspect for uneven wear
- Rotate tires
- Verify proper inflation
- Perform wheel alignment
Properly aligned wheels extend tire life and improve fuel efficiency, critical factors for fleet vehicles that rack up miles quickly.
Battery & Electrical Systems
Cold weather weakens batteries, and spring is when many failing batteries finally give out. Testing battery voltage, charging systems, and starter performance can prevent inconvenient no-start situations on busy mornings. Additionally, fleet vehicles often rely on auxiliary electrical systems such as lift gates, lighting, and trailer wiring. Ensuring all components function correctly supports both productivity and safety.
Fluids & Filters
Spring maintenance should include checking and replacing:
- Engine oil and filter
- Transmission fluid
- Coolant
- Brake fluid
- Power steering fluid
- Air and cabin filters
Clean fluids and filters help engines run efficiently and reduce long-term wear.
Plan Ahead with Northport Spring & Brake
For businesses in Northport, NY, and across Long Island, the busy season waits for no one. Scheduling spring fleet maintenance now helps you avoid reactive repairs later. At Northport Spring & Brake, we specialize in servicing light, medium, and heavy-duty trucks with the precision and attention your fleet deserves.
Don’t let preventable issues slow your operation down. Get ahead of the rush and make sure your fleet is ready to perform all season long.

- 0 comments
How Cold Weather Affects Your Vehicle Battery ❄️🔋
Winter on Long Island can be tough on vehicles, especially when temperatures drop below freezing. For drivers in Northport and across Suffolk County, one of the most common cold-weather problems is battery failure. Many people only think about their car battery when their vehicle won’t start, but understanding how cold weather affects your battery can help prevent inconvenient breakdowns and costly repairs.
Why Cold Weather Is Hard on Batteries
Vehicle batteries rely on chemical reactions to produce the electrical energy needed to start your engine. When temperatures drop, these chemical reactions slow down. This means your battery produces less power just when your vehicle needs more energy to start.
At 32°F, a car battery can lose about 20% of its strength. At 0°F, it can lose up to 50% of its available power. If your battery is already aging or weak, cold weather can push it past the point where it can reliably start your vehicle. Heavy trucks and diesel-powered vehicles are especially affected because they require more power to start than standard passenger vehicles.
Cold Weather Increases Engine Load
Starting your vehicle in winter requires more electrical power. Motor oil thickens at lower temperatures, making it harder for the engine to turn over. This forces the starter motor to draw more energy from the battery.
For trucks and commercial vehicles that sit overnight or for extended periods, this effect can be even more noticeable. A battery that works fine in warm weather may struggle once winter arrives.
Warning Signs of a Weak Battery
Cold weather often reveals battery problems that may have gone unnoticed during warmer months. Some common warning signs include:
- Slow engine cranking when starting
- Dim headlights
- Electrical accessories are working poorly
- Clicking sound when turning the key
- Dashboard battery warning light
- Needing frequent jump-starts
If you notice any of these symptoms, it’s best to have your battery tested before it fails completely.
Battery Age Matters
Most vehicle batteries last between three and five years. If your battery is nearing the end of its lifespan, winter is often when it will fail.
Even if your battery seems to be working fine, an older battery may not have enough reserve capacity to handle cold temperatures. A simple battery test can determine whether your battery is still reliable.
How to Protect Your Battery in Winter
Fortunately, there are several simple steps you can take to extend your battery’s life during the colder months.
Keep Your Battery Clean
Corrosion on battery terminals can reduce electrical flow. Cleaning the terminals helps ensure a strong connection.
Drive Regularly
Short trips may not allow your battery enough time to recharge. Longer drives help the alternator restore the battery’s charge.
Park in a Garage When Possible
Keeping your vehicle in a garage or sheltered area protects the battery from extreme cold.
Turn Off Accessories
Make sure lights, heaters, and electronics are turned off before shutting down your vehicle so the battery isn’t drained overnight.
Schedule a Battery Test
Professional battery testing can identify weak batteries before they fail.
Don’t Get Stranded This Winter
Cold-weather battery problems are one of the leading causes of winter breakdowns on Long Island. A quick inspection can help ensure your vehicle starts reliably, even on the coldest mornings.
If your car or truck has been slow to start or your battery is more than a few years old, it may be time for a professional inspection. Preventive maintenance is the best way to avoid being stranded in the cold and keep your vehicle running reliably all winter long.
Regular battery checks are especially important for work trucks and heavy-duty vehicles that operate every day. A dependable battery means fewer delays and more peace of mind throughout the winter season.

- 0 comments
How to Know When Your Brakes Need Replacing
Your vehicle’s braking system is its most critical safety feature. Worn brakes don’t just reduce stopping power; they put you, your passengers, and everyone else on the road at risk. Unfortunately, many drivers don’t realize their brakes are failing until a serious problem occurs. Identifying the warning signs early can prevent costly repairs and dangerous situations.
Below are the most common indicators that your brakes may need replacing, and why taking action quickly matters.
1. Squeaking or Squealing Sounds
One of the first signs of worn brake pads is a high-pitched squealing noise when you apply the brakes. Most brake pads are designed with a built-in wear indicator that creates this sound when the pads get too thin. If you hear a constant squeal every time you stop, it’s time to schedule a brake inspection.
Grinding noises are even more serious. Grinding usually indicates the brake pads are completely worn down, with metal-to-metal contact. At this stage, rotor damage is likely, turning a simple brake pad replacement into a more expensive repair.
2. Vibrations When Braking
If your steering wheel shakes or your brake pedal vibrates when stopping, your brake rotors may be warped. Warped rotors prevent the brake pads from making even contact, reducing stopping efficiency and causing a pulsing sensation. This issue often occurs when brakes overheat due to heavy use, hard stops, or towing. Vibration is not normal and should be addressed quickly, as it can worsen over time and affect your vehicle’s handling.
3. The Vehicle Pulls to One Side
When braking, your vehicle should slow down evenly. If it pulls to the left or right, one brake may be working harder than the other. This can be caused by uneven pad wear, a stuck caliper, or contaminated brake fluid. Not only does this reduce braking performance, but it also increases tire wear and makes the vehicle harder to control.
4. A Spongy or Soft Brake Pedal
Your brake pedal should feel firm and responsive. If it feels soft, spongy, or sinks to the floor, it may indicate air in the brake lines or a brake fluid leak. Low or contaminated brake fluid reduces hydraulic pressure, making it harder to stop. This is a serious safety issue that requires immediate attention.
5. Warning Lights on the Dashboard
Many modern vehicles have brake warning lights that activate when the system detects a problem. This could indicate low brake fluid, worn pads, or a malfunction in the braking system. Never ignore a brake warning light; your vehicle is alerting you to a potential safety hazard.
6. Burning Smell After Driving
A sharp, chemical odor after braking, especially after downhill driving or heavy braking, can indicate your brakes are overheating. Overheated brakes lose effectiveness and can fail without warning. If you smell burning, safely pull over and allow your brakes to cool before continuing.
7. Reduced Stopping Power
If your vehicle takes longer to stop or you need to press harder on the brake pedal, your brakes may be nearing the end of their life. Reduced stopping power is a clear warning sign that your braking system is no longer performing as it should.
Why Regular Brake Inspections Matter
Brake systems wear down gradually, which makes it easy to miss early signs of trouble. Regular inspections can catch problems before they become dangerous or expensive. Most manufacturers recommend checking your brakes every 10,000 to 15,000 miles, or at least once a year. Your brakes are too important to ignore. If you notice any of these warning signs, have your braking system inspected as soon as possible. Replacing worn brakes on time not only protects your vehicle, but it also protects lives.
Staying proactive about brake maintenance ensures safer driving and peace of mind every time you hit the road.
- 0 comments
Key Signs Your Car Needs a Wheel Alignment
1. Uneven Tire Wear
2. Pulling or Drifting While Driving
3. Vibrating Steering Wheel
4. Crooked or Off-Center Steering Wheel
5. Loose or Wandering Steering
6. Squealing Tires or Noisy Turns
When to Check Your Alignment
- After hitting a pothole, curb, or being in a minor accident
- After installing new tires or suspension parts
- As part of regular maintenance, every 6,000 miles or at least once a year
